Strapi 是一个无头内容管理系统,其管理界面默认提供了邮箱登录的方式。不过,其邮箱密码账户是其单独的用户系统,需要单独维护。对于一个组织来说,很可能已经有一个甚至多个现有的用户系统了,再额外增加一套用户系统,不仅增加了管理成本,对于终端用户使用也极为不便。所以,非常有必要为 Strapi 的管理界面提供一种单点登录的方式。
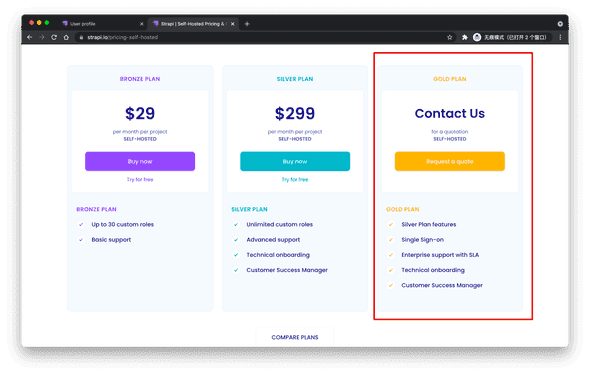
Strapi 系统其实是已经支持了单点登录的特性的,不过该功能并非免费,需要联系销售购买许可证。

假设你已经有了 Strapi 的企业级许可证,那么你现在可以为 Strapi 的管理界面开启单点登录功能。

不过这还不够,在适配身份源时,还需要做更多工作。如果你的身份源不在 Strapi 默认的身份提供者列表里,那就还需要写一丢丢代码来做这个适配。本文正是针对这个场景,为在这方面碰到困难的读者们提供指引。
:::success 联系 Strapi 的销售购买许可证,不是一个能够立即完成的事情。如果你只想在测试环境快速验证一下该功能,那么建议你仔细阅读《修改 node_modules 的三种方式,隆重推荐 patch-package - Jeff Tian的文章 - 知乎 》一文,当你真正读懂了,你是完全可以在你的测试场景中使用 Strapi 完整的企业版功能的(请自觉不要正式使用)。 :::
本文将给出两个示例,分别是对接 Authing 和其他的 OIDC 身份提供者(比如 Keycloak、Duende IdentityServer 等)。其实对接 Authing 也是对接 OIDC 的一个特例,但是特别值得推荐,所以单独列出。
最终效果
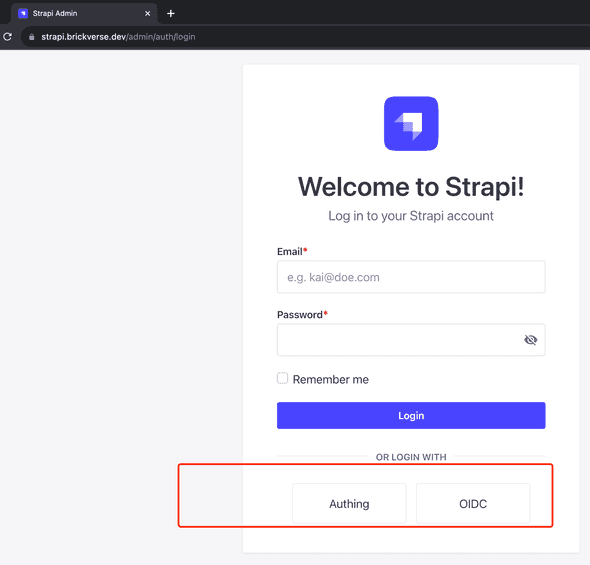
我们实现的最终效果是可以在 Strapi 的管理界面上,在默认的邮箱登录方式之外增加两个额外的选项。

不过目前由于 OIDC 对接了一个内网环境的提供者,暂时有 IP 白名单限制。
Passport
首先要知道 Strapi 的管理后台的身份认证系统是基于 Passport 库的,Passport 是一个个人开发者开发的 nodejs 库,基于策略模式可以非常方便地适配各种不同的身份源,所以其生态特别丰富,基本上主流的身份平台都有对应的策略。 :::success 我也曾在 2019 年实现过一个 Passport 策略,用来对接花旗银行的开放 API,源代码见: https://github.com/Jeff-Tian/passport-citi 。 :::
对接 Authing
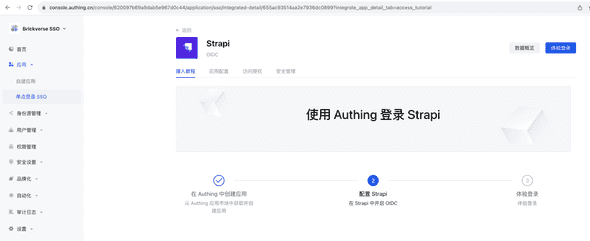
在 Authing 的控制台里,通过添加集成应用到单点登录 SSO,可以直接选择 Strapi,就能看见一个非常棒的接入教程。

该教程基于 Passport 和 OAuth 2 策略,自行写了一个适配 Authing 的 OIDC 策略来实现。本文想给它做一个补充,即通过开源的 Authing 策略,用更少的代码接入。这个开源的 Authing Passport 策略库是: “passport-authing”。
通过在 strapi 项目的 config/admin.js 添加一些代码,即可完成 strapi 与 Authing 的对接,代码如下:
javascript const AuthingStrategy = require(passport-authing).Strategy;
module.exports = ({env}) => {
const authing = {
uid: authing,
displayName: Authing,
icon: ,
createStrategy: (strapi) => {
return new AuthingStrategy({
// 从 Authing 的控制面板里复制过来
domain: xt1o6lgf.authing.cn,
// 从 Authing 的控制面板复制具体的值,建议存储在环境变量里
clientID: env(AUTHING_CLIENT_ID),
clientSecret: env(AUTHING_CLIENT_SECRET),
scope: [
email,
profile,
openid
],
callbackURL: strapi.admin.services.passport.getStrategyCallbackURL(
authing // 需要与上面的 provider 一致
),
}, (request, accessToken, refreshToken, profile, done) => {
done(null, {
email: profile.emails[0].value,
firstname: profile.givenName ?? profile.displayName ?? profile.emails[0].value,
lastname: profile.familyName ?? profile.nickname ?? profile.emails[0].value
})
});
}
};
return ({ auth: { secret: env(ADMIN_JWT_SECRET), providers: [ oidc ] }, apiToken: { salt: env(API_TOKEN_SALT), }, transfer: { token: { salt: env(TRANSFER_TOKEN_SALT), }, }, flags: { nps: env.bool(FLAG_NPS, true), promoteEE: env.bool(FLAG_PROMOTE_EE, true), }, }); });
对接其他的 OIDC 提供者
其实和对接 Authing 很像,但是为了展示如何做更多的定制化,我们先自己写一个 passport oidc 策略。更多的定制化功能,我们以 IP 白名单举例。这需要重载默认的授权方法,检测到用户的 IP 地址不在白名单里时,就拒绝进行授权。完整代码如下,注意获取用户的 IP 地址时,需要从 x-forwarded-forHTTP 头里获取,而不能使用 request.socket.remoteAddress 的方式。 因为请求从用户的出口 IP 到达 strapi 的服务,中间可能会经过多个代理服务器的跳转,所以只有使用 x-forwarded-for才能获取到用户的稳定出口 IP,而 request.socket.remoteAddress的值可能每次都不一样。除非用户的机器到 strapi 的服务只经过一跳,否则它们的值是不相等的。 javascript const util = require(util) // passport-oauth2 需要 npm/yarn 等安装 const OAuth2Strategy = require(passport-oauth2) const InternalOAuthError = OAuth2Strategy.InternalOAuthError const request = require(request);
function Strategy(options, verify) { options = options || {}
options.scope = options.scope || openid profile email
this.userInfoURL = options.userInfoURL; // 从选项中读取 IP 白名单列表 this.ipWhitelist = options.ipWhitelist ?? [];
OAuth2Strategy.call(this, options, verify)
this.name = options.provider || oidc }
// 从 OAuth2Strategy 继承出 Strategy util.inherits(Strategy, OAuth2Strategy)
// 记住原有的授权方法 const authenticate = Strategy.prototype.authenticate;
// 改造授权方法,以检测 IP 是否在白名单中 Strategy.prototype.authenticate = function (req, options) { const clientIp = req.get(x-forwarded-for);
if (this.ipWhitelist.indexOf(clientIp) < 0) { throw this.fail({message: IP 地址 ${clientIp} 不在白名单中!}); }
return authenticate.call(this, req, options); };
// 获取用户信息 Strategy.prototype.userProfile = function (accessToken, done) { const self = this
const options = { method: GET, url: self.userInfoURL, headers: { Authorization: Bearer + accessToken } };
request(options, function (err, response) { if (err) { return done(new InternalOAuthError(Failed to fetch user profile, err)) }
try {
  const json = JSON.parse(response.body)

  done(null, json);
} catch (ex) {
  return done(new Error(Failed to parse user profile))
}
}); }
// 对外暴露策略 module.exports = { Strategy, }
有了以上策略,我们就可以在 admin.js 中添加 OIDC 登录方式了,这里以对接我部署好的 Duende IdentityServer 为例:
diff const AuthingStrategy = require(passport-authing).Strategy;
- const OIDCStrategy = require(./passport-oidc).Strategy;
module.exports = ({env}) => {
- const oidc = {
- uid: oidc,
- displayName: OIDC,
- icon: ,
- createStrategy: (strapi) => {
-
return new OIDCStrategy({ -
issuer: https://id6.azurewebsites.net/, -
authorizationURL: https://id6.azurewebsites.net/connect/authorize, -
tokenURL: https://id6.azurewebsites.net/connect/token, -
userInfoURL: https://id6.azurewebsites.net/connect/userinfo, -
provider: oidc, -
clientID: strapi, -
clientSecret: strapi, -
callbackURL: strapi.admin.services.passport.getStrategyCallbackURL( -
oidc // 需要与上面的 provider 一致 -
), -
ipWhitelist: env(IP_WHITE_LIST, ).split(,).map(ip => ip.trim()).filter(ip => ip.length > 0), -
}, (request, accessToken, refreshToken, profile, done) => { -
done(null, { -
email: profile.email, -
firstname: profile.givenName ?? profile.displayName ?? profile.email, -
lastname: profile.familyName ?? profile.nickname ?? profile.email -
}) -
}); - }
- };
return ({ auth: { secret: env(ADMIN_JWT_SECRET), providers: [ authing,
-
},oidc ]
总结
本文详细说明了如何使用 passport 策略给 Strapi 管理界面添加新的单点登录方式。
